
Reference track management means keeping a small, purpose-labeled set of finished songs alongside a repeatable, level-matched session setup so you can compare your mix quickly and fairly. Start now by picking two or three references, naming the job each one does, and level-matching a comparable 8 to 16 bar section before you A/B. This single habit removes loudness bias and turns guesswork into a faster, more reliable decision.
TL;DR:
- Match tempo, bass and kick roles, and song structure before trusting a reference; genre similarity matters less than comparing equivalent verses, choruses, or drops.
- Route each reference directly to monitor output, bypassing master bus processing, and create a single keystroke switch so comparisons stay clean and frequent.
- Keep loops to 8 to 16 bars, assess balance, tone, then punch and space, and change one setting between passes to identify what helped.
- Store references separately with role tags, tempo, section markers, and notes; back up the collection and remove tracks that no longer answer a clear question.
Table of Contents
- How to choose the right reference tracks
- Session setup for reliable, repeatable comparisons
- Listening workflow: short A/B passes, level-matching, and the one-change rule
- Organizing and maintaining your reference collection and metadata
- Evidence and practitioner rules behind the recommendations
- Best practices for integrating reference tracks into different DAWs and plugin setups
- Advanced techniques for multi-reference track comparison
- Author’s perspective: bringing reference discipline into studio habit
- How Audome supports reference track management and project organization
- FAQ
- Sources
How to choose the right reference tracks
Most producers grab too many references and end up with a pile of inspiration instead of a tool. A better approach is to limit yourself to two or three tracks and give each one a specific job. One might represent the stylistic lane you’re aiming for, another the balance and energy you want on the low end, and a third the arrangement pacing you’re trying to match. Practitioner guidance on using references in production supports this narrow approach: starting with 2 to 3 reference tracks, each assigned a distinct listening job, keeps comparisons focused instead of scattered.
Arrangement match matters more than genre match. A pop vocal mix and a modern R&B track can share almost identical low-end roles and vocal presence even though they sound nothing alike stylistically. Before you trust a reference, check that its tempo and the role its bass and kick play are close to what you’re building. A reference with a sparse arrangement won’t tell you anything useful about a dense, layered chorus.
Once you’ve chosen your references, compare equivalent sections rather than whole songs. Chorus to chorus, drop to drop, verse to verse: matching structural moments removes a huge source of noise, because a mix always sounds different during a sparse verse than during a packed hook. Comparing a verse in your project against a chorus in the reference will mislead you every time.

When references start pulling in different directions, don’t add more tracks to break the tie. One track might push you toward a brighter top end while another suggests restraint, and resolving that conflict by adding more references usually just adds confusion. Instead, add one short “sanity check” track, something you know well and trust completely, and use it to settle the disagreement.
Before you start listening, write one short note per reference describing what you expect to learn from it. This keeps the session purposeful instead of reactive.
A simple reference-selection checklist:
- Choose two or three tracks, no more, each with a clearly defined listening job.
- Match tempo and low-end role before worrying about genre or style.
- Compare equivalent song sections, not whole tracks against whole tracks.
- Add one sanity-check reference if your chosen tracks disagree, rather than piling on more.
- Write a one-line note per reference before you start A/Bing.
Session setup for reliable, repeatable comparisons
A reference track only tells you the truth if it’s isolated from your own processing chain. Routing it through your master bus means you’re comparing your mix against a version of the reference colored by your own compression and EQ decisions, which defeats the entire point. Set up a dedicated reference channel that bypasses your master chain completely, so what you hear is the actual released, commercial version of that track.
A practical setup looks like this, and if you’re working on music videos, this Music Video Project Editing Guide for Creators – Kudoflix Video Editing can be a helpful resource for syncing and editing your video timelines alongside your audio references.
- Create a separate audio or aux track for each reference and route it directly to your monitor output, not through your master bus.
- Time-align the reference to your session grid when you want to compare arrangement pacing or where a drop or chorus lands.
- Build a fast switching mechanism, whether that’s a keyboard shortcut, a MIDI controller toggle, or a mute group, so flipping between your mix and the reference takes a fraction of a second.
- Insert a level-matching plugin or a simple gain trim on each reference channel so you can match perceived loudness before every comparison pass.
- Mark session locations for the sections you’re comparing (chorus, drop, verse) so you can jump straight to them without scrubbing the timeline.
The switching speed matters more than it might seem. If flipping between your mix and a reference takes several seconds of clicking through menus, you’ll check less often and trust your ear less in the moment. A single key command that mutes your master and solos the reference channel, or vice versa, encourages the kind of frequent, low-friction checking that actually improves decisions over the course of a session.
Keep your reference channels completely separate from any processing you apply to your own tracks. It’s tempting to run a quick EQ sweep on a reference to “hear it better,” but that erases the exact thing you’re trying to measure against: how the released track actually sounds.
Pro Tip: Save your reference channel setup, complete with routing, level-match plugin, and mute group, as a track template so every new session starts with your comparison system already in place.
Listening workflow: short A/B passes, level-matching, and the one-change rule
Level-matching has to happen before any judgment, not after. If one track is playing louder than the other, your ear will perceive it as punchier, wider, and more exciting regardless of what’s actually happening tonally. This is why the AES explains loudness normalization as a comparison control rather than a creative target: album normalization applies one gain across a full album to preserve the loudness relationships between tracks, while track normalization adjusts each track independently. The AES guidance uses 16 LUFS as one example tied to a specific delivery standard for online content, but it’s explicit that this isn’t a universal mastering target. The number exists to make fair comparisons possible, not to tell you how loud your final master should be.
Loudness matching removes the single biggest source of bias in A/B comparisons. Treat loudness as a dial you set once per session, not a creative decision you revisit every time you switch tracks.
Short loops protect your objectivity in a different way. Comparing full songs invites fatigue and lets your memory of the opening verse color your opinion of the bridge three minutes later. Looping an 8 to 16 bar section, roughly 10 to 15 seconds, keeps the comparison tight enough that your ear can actually track specific differences instead of forming a vague overall impression.
A structured listening routine turns this into a repeatable process:
- Balance. Listen for the broad level relationships, lead vocal against music bed, kick against bass, and catch any obvious wins or problems first.
- Pass 2: Tone. Compare overall frequency character, brightness, warmth, and midrange density between your mix and the reference.
- Pass 3: Punch and space. Zero in on transient impact, perceived width, and depth, the micro-adjustments that separate a good mix from a finished one.
Change only one parameter between passes, then write down a single specific difference you heard. If you adjust the vocal compression, the low end, and the reverb send all before your next listen, you won’t know which change actually mattered. This one-change discipline is slower in the moment but faster overall, because it stops you from chasing a sound through trial and error with no record of what worked.
When evaluating kick versus bass in Pass 1, listen for which element carries the low-frequency identity of the track: some references lean on a prominent sub-bass with a thin kick, others do the opposite. In Pass 2, midrange clarity shows up as whether vocals and lead instruments cut through a busy arrangement without fighting guitars or synths for the same frequency space. In Pass 3, perceived width often comes down to how stereo information is distributed between 200 Hz and 2 kHz rather than the extreme highs, which is where a lot of mixes either sound narrow and boxed in or artificially stretched.
Organizing and maintaining your reference collection and metadata
A reference collection that lives scattered across a general music library becomes unusable within a few months. Keep your references in a dedicated folder or project separate from your personal listening library, so you’re never scrolling past hundreds of unrelated tracks to find the three you actually use for comparison.
Consistent naming and tagging keep that collection useful over time:
- Tag each reference with its listening job (balance, tone, arrangement) directly in the filename or metadata field.
- Record the tempo and any relevant section markers (chorus start, drop timestamp) so you don’t have to re-scrub the track every session.
- Add a short note describing what the reference teaches you, written the first time you use it, so future sessions don’t require re-discovering why you chose it.
- Run periodic maintenance: relocate any files that have moved or gone missing, re-analyze tracks if your software’s metadata has drifted, and export a backup of the whole collection. The Traktor manual’s track-collection guidance outlines exactly this kind of consistency check, file relocation, and backup export process, and the same logic applies whether you’re organizing DJ tracks or mixing references.
- Restore from backup whenever you move to a new machine or drive, rather than rebuilding tags and notes from scratch.
Broken references, usually caused by moved or renamed files, are one of the most common ways a once-useful collection turns into dead weight. A quick relocate-and-verify pass before a big project saves time later.
Not every reference deserves a permanent spot. If a track no longer answers a clear listening question, whether because your ear has moved past it or because it was only ever useful for one specific project, retire it. A lean, well-labeled set of references that you actually trust beats a sprawling library of tracks you never touch.
Evidence and practitioner rules behind the recommendations
The case for loudness matching isn’t a studio superstition. The AES loudness normalization guidance explains that playback systems increasingly normalize audio automatically, which means the loudness war advantage of simply mastering louder has eroded. Matching playback level during A/B comparisons respects this reality: you’re comparing tone, balance, and arrangement rather than letting raw volume fool your ear. The AES framing treats loudness figures as comparison controls and delivery-context information, not fixed artistic targets.
Practitioner workflow guidance reinforces the same discipline from a different angle. Recommendations to use two to three labeled references, compare matching sections, and change one parameter at a time show up consistently because they solve a real problem: references are easy to misuse when there are too many of them, when sections don’t line up, or when multiple changes get made before the next listen.
References calibrate your ear. They don’t hand you a template to copy.
That distinction runs through every recommendation in this guide. A reference tells you where your balance, tone, or punch sits relative to a trusted target, not what specific plugin settings to dial in. Treat them as a measurement tool and the whole workflow stays useful indefinitely.
Best practices for integrating reference tracks into different DAWs and plugin setups
Most modern DAWs handle reference routing the same basic way, even if the exact menu names differ. In Ableton Live, a dedicated return track with reference files routed directly to your main output, bypassing group processing, works well. Logic Pro users can create an auxiliary channel strip with no plugins and a simple gain stage for level-matching. Pro Tools and Cubase both support dedicated reference tracks that sit outside your mix bus, which keeps the signal clean.
For the level-matching step itself, a basic loudness meter or a dedicated A/B comparison plugin saves time over manually riding a fader. These plugins typically show integrated loudness for both your mix and the reference simultaneously, so you can match them with one glance rather than guessing.
Whatever DAW you use, the setup principle stays constant: the reference channel should never pass through your master bus processing, and it should be one keystroke away from your main mix at all times. If your session template doesn’t already include this, build it once and reuse it on every project going forward.
Advanced techniques for multi-reference track comparison
Once the basic A/B workflow feels automatic, a few additional tools sharpen the comparison further. A spectrum analyzer running on both your mix and your reference, viewed side by side or overlaid, shows exactly where tonal balance diverges, which is especially useful when your ear struggles to pin down whether a difference is in the low-mids or the upper-mids.
Phase correlation metering helps when a reference and your mix seem to sit differently in terms of punch or clarity despite similar tonal balance. A reference with tighter phase correlation in the low end often reads as punchier even at identical loudness, and checking correlation can explain why a kick or bass feels more solid on one track than another.
Stereo imaging tools, whether a goniometer or a simple correlation meter, reveal how wide each reference actually is and where that width lives in the frequency spectrum. Comparing this against your own mix shows whether your sense of a track feeling “narrow” or “artificially wide” is actually a stereo-field issue rather than a tonal one. These tools work best as a secondary check after your ear has already flagged something worth investigating, not as a replacement for the three-pass listening workflow itself.
Author’s perspective: bringing reference discipline into studio habit
The most common mistake isn’t picking bad references, it’s picking too many and skipping the level-match step entirely. A producer juggling too many tracks with no loudness control is really just listening to volume differences and calling it taste. Clumsy switching causes the same damage in a quieter way: if flipping to a reference takes too long, you’ll check less often, and frequent comparisons help build useful pattern recognition.
A short checklist changes this fast: choose your references, label their jobs, build a one-key switch, level-match, then use a consistent listening routine. Teams that adopt even this much tend to settle on a final mix with fewer revision rounds, because decisions get made with evidence instead of fatigue.
Start with one habit, probably level-matching, before adding the rest. Discipline compounds faster than any single technique.
— Kreg
How Audome supports reference track management and project organization
Once your reference workflow is dialed in, the next challenge is keeping that work organized across projects, revisions, and client feedback, which is exactly where we built Audome to help. We let you upload unlimited high-resolution audio, so your references and mix exports live in full quality inside the same workspace instead of scattered across Dropbox links and email threads.
- Keep a project’s reference set alongside your working mixes in one organized workspace, so the tracks you’re comparing against never go missing.
- Attach timestamped notes directly on the waveform for each loop you compare, capturing exactly what a section revealed instead of relying on memory.
- Use version history to keep track of mix revisions as you make reference-driven changes.
- Deliver through password-protected project pages, and require payment before final downloads unlock if that fits your studio’s policy.
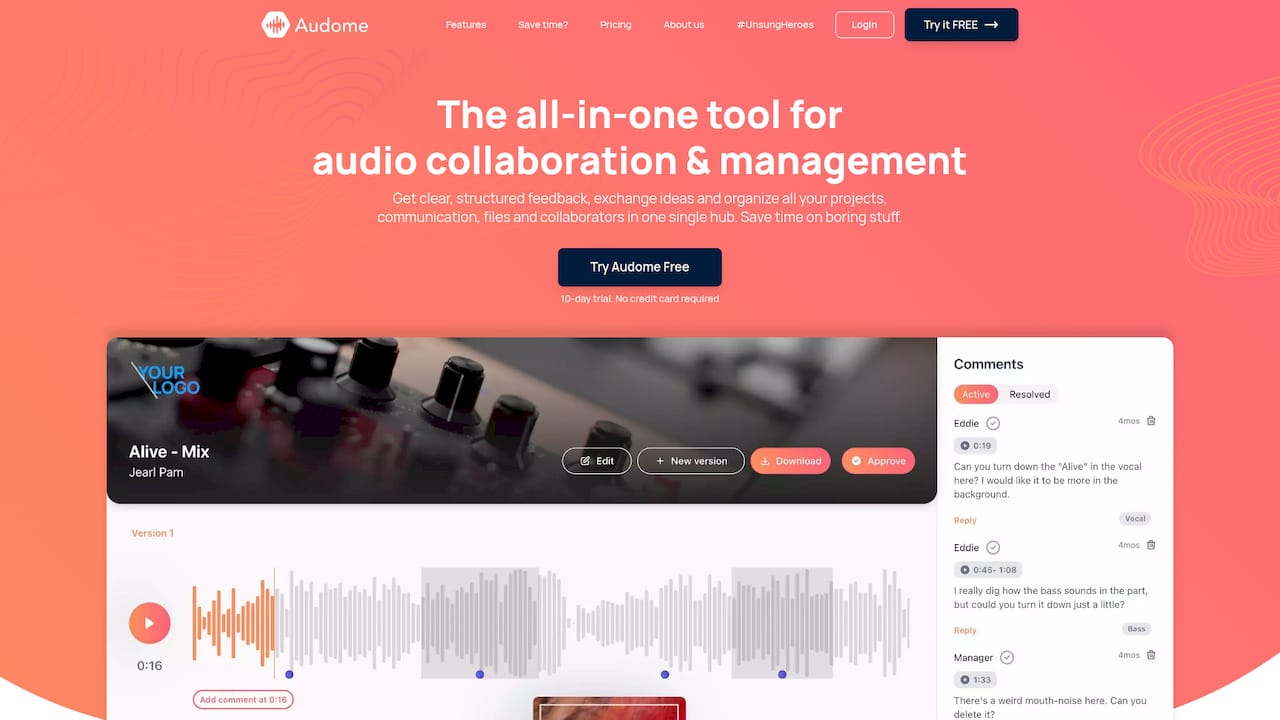
If you’re ready to bring that same discipline to how you organize projects and collect feedback, our Studio plan starts at $12.5 per month. Current prices are on our pricing page. Check out Audome’s pricing to find the plan that fits your studio.
FAQ
What is a reference track?
A reference track is a finished, commercially released song used as a listening benchmark while you mix or master, helping you judge balance, tone, and loudness against a trusted standard. A useful reference set can include a small number of tracks, each assigned a specific job like tonal balance or arrangement pacing.
What is the rule of 32 in DJing?
This question refers to a DJ mixing convention rather than a reference track management practice, and it falls outside what this guide covers. For reference track workflows in production and mixing, the more relevant structure is looping short, matching sections of 8 to 16 bars to compare your mix against a reference.
Can ChatGPT mix and master a song?
General-purpose AI chat tools are not built to analyze audio waveforms, apply EQ or compression, or make the kind of level-matched, section-by-section comparisons a proper reference workflow requires. Mixing and mastering decisions still depend on trained listening against labeled reference tracks using the loudness-matching and loop-based techniques described above.
How do I properly use reference tracks?
Choose two or three references, give each one a clear listening job, and level-match a short, comparable section before judging anything. Loop 8 to 16 bars at a time, check balance, tone, and punch in separate listening passes, and change only one parameter between listens so you know exactly what caused each improvement.
How many reference tracks should I use at once?
Two to three is the practical limit for most sessions, since more than that tends to create conflicting signals rather than clearer direction. If your chosen references disagree on a point, add one additional sanity-check track you trust rather than expanding the whole set.
Sources
- All The Essentials On Using Reference Tracks in Music Production (…And A Couple Less Talked About Tricks) – Magnetic Magazine
- Loudness Normalization