
TL;DR:
- Export audio as lossless WAV files at the session’s native sample rate and 24-bit depth for best quality. Organize files clearly with consistent naming, batch deliverables into small groups, and perform thorough post-export quality control. Using dedicated portals with timestamped comments streamlines client feedback and prevents revision delays.
Exporting audio deliverables correctly means delivering lossless WAV files at your session’s native sample rate and bit depth, with proper loudness standards and organized file naming, so clients and platforms receive exactly what they need without back-and-forth. The best practices for exporting audio deliverables for clients and platforms cover four core areas: technical export settings, file organization, quality control, and delivery workflow. Get any one of these wrong and you risk rejected uploads, confused clients, and unpaid revision cycles. This guide covers every stage with the specificity working audio professionals need.
What are the industry standard file formats and technical settings for export?
The professional standard is to deliver lossless WAV files at your session’s native sample rate, with a minimum of 44.1 kHz and a bit depth of 24-bit. WAV preserves every bit of audio data captured during recording and mixing. Lossy formats like MP3 or AAC discard frequency information permanently, making them unsuitable for masters or stems sent to clients.
Sample rate and bit depth matter beyond just quality. Delivering files at native settings without unnecessary conversion prevents artifacts caused by resampling algorithms. If your session runs at 48 kHz/24-bit, export at 48 kHz/24-bit. Do not convert to 44.1 kHz unless the client or platform explicitly requires it.
Stereo delivery is the standard for streaming platforms. Mono files frequently trigger automated rejections on distribution platforms, so always confirm your export is a proper 2-channel stereo file before sending. This is one of the most common and avoidable submission errors.
Loudness standards vary by destination. Broadcasting follows ATSC A/85 or EBU R128, while streaming platforms target around -14 LUFS with a true peak ceiling near -1 dBTP. Dialogue tracks typically sit between -18 and -12 dBFS, and music tracks average around -14 dBFS. Knowing the destination before you export determines your loudness target. For a deeper look at how these targets apply across platforms, platform loudness specs are worth reviewing before finalizing any master.
Dithering is a specific and often misunderstood step. Apply dither only once, at the final export stage, and only when you are reducing bit depth, such as going from 24-bit to 16-bit for a CD master. Applying dither to intermediate bounces or when bit depth stays the same introduces unnecessary noise. Skip it entirely when exporting stems or files that will be processed further downstream.
| Setting | Recommended value |
|---|---|
| File format | WAV (lossless) |
| Sample rate | 44.1 kHz minimum, 48 kHz standard |
| Bit depth | 24-bit |
| Channel config | Stereo (2-channel) |
| Loudness (streaming) | -14 LUFS integrated, -1 dBTP true peak |
| Dither | Final step only, when reducing bit depth |
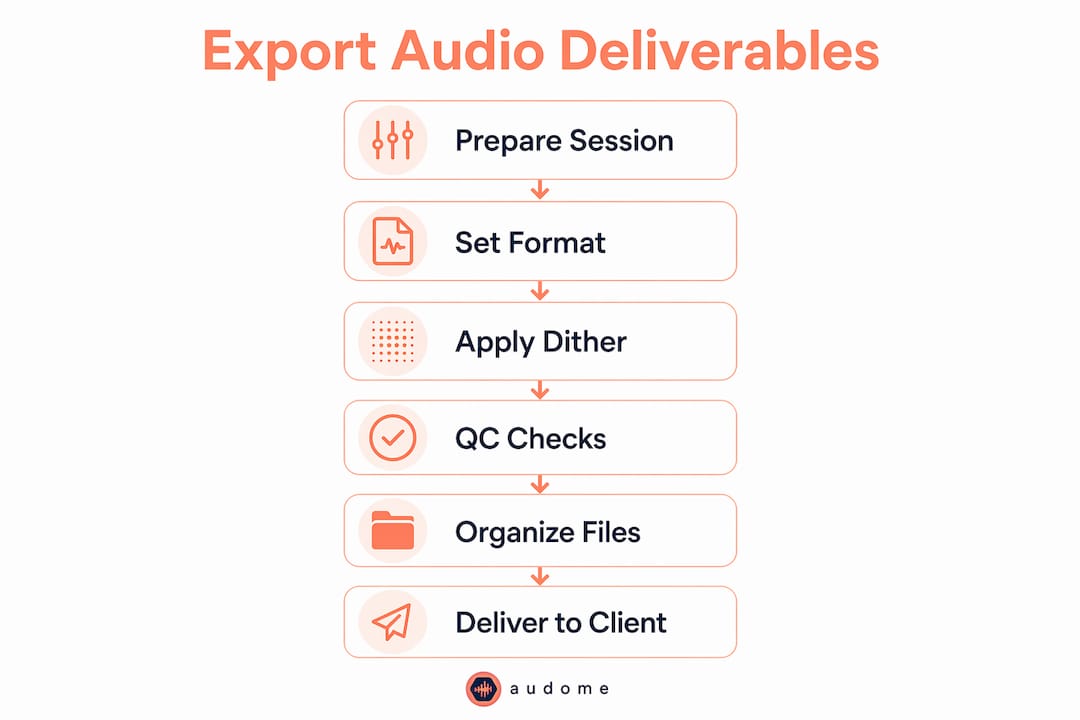
Pro Tip: Save your export settings as a named template inside your DAW. A saved template eliminates the risk of accidentally exporting at the wrong sample rate or bit depth between projects.
How to organize and name audio files for clarity and client use
Clear file organization is the difference between a client who imports your stems in five minutes and one who emails you three times asking which file is the final version. The export audio files best practice here starts before you hit render.
- Consolidate all stems from bar 1. Every stem should start at the same point in the timeline, even if the track is silent for the first 16 bars. This guarantees perfect sync when the client imports into their DAW.
- Use a consistent naming convention. Include the project name, track name, version number, and date. A format like
ProjectName_StemType_v2_2026-06removes all ambiguity. - Include a full stereo rough mix. A reference stereo mix gives the client a sonic benchmark and helps them verify that stems imported correctly.
- Maintain 3–6 dB of headroom on main mix files intended for mastering. This gives the mastering engineer room to work without clipping.
- Batch deliverables into groups of 3–5 files. Sending 30 stems at once overwhelms clients and produces vague feedback. Smaller batches create natural checkpoints.
Batching deliverables into 3–5 files per round keeps client feedback focused and manageable. That structure also creates natural approval milestones, which protects you from scope creep and endless revision requests.
Pro Tip: Build a delivery checklist template you send to clients before they submit raw files to you. Specifying format, sample rate, and naming upfront prevents you from receiving a folder of misnamed MP3s on a deadline.
Standardized pre-upload checklists given to clients before file submission reduce administrative delays and catch format errors before they reach your session. That upfront step compresses project timelines more than any other single habit.
What are the best practices for final quality control before delivery?
Post-export quality control is not optional. Post-render QC on exported files catches routing errors, clipping, and encoding issues that DAW session monitoring never reveals. Your session may sound perfect on playback, but the rendered file can still contain errors introduced during the bounce process.
Run every exported file through a dedicated QC pass that covers these points:
- Clipping check. Open the file in a fresh session or audio editor and scan for any peaks above 0 dBFS. A file that clips on delivery is unprofessional and unusable.
- Headroom verification. Confirm the file has the correct headroom for its intended destination, whether that is mastering, broadcast, or streaming.
- Mono compatibility. Collapse the stereo file to mono and listen for phase cancellation. Significant cancellation means elements will disappear on mono playback devices.
- Metadata accuracy. Check that embedded metadata, including title, artist, ISRC, and sample rate, matches what the client expects.
- Loudness measurement. Run an integrated loudness measurement and confirm it hits the target for the delivery destination.
- Playback on multiple devices. Listen on headphones, studio monitors, and a consumer speaker if possible. Problems that hide on one system often surface on another.
Checking mono compatibility, headroom, and loudness before delivery avoids client dissatisfaction and platform rejections. These are the exact errors that generate revision requests and damage your professional reputation.
Pro Tip: Create a DAW export template that locks your routing, format, and loudness settings. Routing errors, where the wrong bus feeds the export, are the most common source of stem delivery mistakes and the easiest to prevent with a saved template.
How to deliver audio files to clients and platforms effectively?
The delivery method shapes the entire client experience. Generic cloud storage creates feedback fragmentation. A client who leaves comments in a shared folder’s notes field, then sends follow-up thoughts by email, then texts you a timestamp, has given you three pieces of feedback you now have to reconcile manually. That is a workflow problem, not a client problem.
Dedicated audio collaboration portals with timestamped commenting and version control eliminate the ambiguity that generic cloud tools create. Clients can pin feedback to the exact second in a file, which means engineers spend time fixing real issues rather than decoding vague notes like “the chorus feels off.”
Dedicated audio collaboration portals reduce miscommunication by giving clients a single place to listen, comment, and approve. Timestamped feedback tied to specific moments in the waveform replaces scattered emails and texts. That precision cuts revision cycles significantly.
When setting up client delivery, follow these practices:
- Name project spaces clearly. Use the client name, project title, and version so nothing gets confused across multiple active projects.
- Include notes with each upload. A short description of what changed in version 3 versus version 2 saves clients from listening to both files in full just to find the difference.
- Enable approval workflows. Require explicit sign-off before moving to the next stage. This creates a paper trail and prevents “I thought we were done” disputes.
- Use links that do not require client logins. Friction at the access point kills momentum. Clients who have to create accounts often delay feedback by days.
- Verify platform-specific requirements before uploading. Distribution platforms have specific rules around file format, loudness, and channel configuration. A mono file or an out-of-spec loudness level triggers an automated rejection.
For a complete walkthrough of managing client approval steps, the producer-client workflow guide covers the full process from first upload to final sign-off.
Key Takeaways
Delivering professional audio requires lossless WAV files at native session settings, correct loudness targets, organized naming, rigorous post-export QC, and a dedicated delivery portal that keeps client feedback precise and traceable.
| Point | Details |
|---|---|
| Use WAV at native settings | Export at your session’s sample rate and 24-bit depth without unnecessary conversion. |
| Match loudness to destination | Target -14 LUFS for streaming and follow ATSC A/85 or EBU R128 for broadcast. |
| Apply dither only at final export | Use dither once, only when reducing bit depth, never on intermediate bounces. |
| Batch files in groups of 3–5 | Smaller delivery batches produce focused client feedback and clear project milestones. |
| Run post-export QC every time | Check clipping, mono compatibility, metadata, and loudness on the rendered file, not the session. |
What I’ve learned from years of export mistakes
The most expensive lesson I ever learned was skipping post-export QC on a stem delivery for a sync placement. The session sounded perfect. The exported drum bus had a routing error that sent the room mic at full volume instead of the processed kit. The client caught it. I didn’t. That one mistake cost me two days of re-renders, a delayed placement, and a conversation I did not want to have.
The second thing I got wrong for years was treating file naming as an afterthought. Clients do not think in terms of DAW track names. They think in terms of what they need to do next. A file called Vox_Lead_Dry_v3_Final_FINAL2 tells them nothing useful. A file called ClientName_LeadVocal_Dry_v3_2026-06 tells them everything. The naming convention is not for you. It is for the person importing your files at midnight before a deadline.
The third shift that changed my delivery workflow was moving away from generic cloud folders entirely. I used to send a shared folder link and wait. Feedback arrived in three different places, always vague, always missing timestamps. Switching to an audio-specific portal with waveform-level commenting cut my revision cycles in half. Clients stopped saying “around the two-minute mark” and started pinning comments to the exact second. That specificity alone is worth the change.
The checklist habit took the longest to build but pays the most. Sending clients a format and naming spec before they submit files feels like extra admin. It eliminates the admin entirely. You stop receiving misnamed MP3s. You stop spending an hour reformatting files before you can even open a session. The checklist is the first quality control gate, and it costs you nothing to send.
— Kreg
How Audome fits into a professional delivery workflow
Audio professionals who want to eliminate scattered feedback and fragmented file delivery have a purpose-built option in Audome. Audome brings project management, file upload, version control, and timestamped waveform feedback into one workspace. Clients can listen and comment without creating an account, which removes the friction that delays feedback.
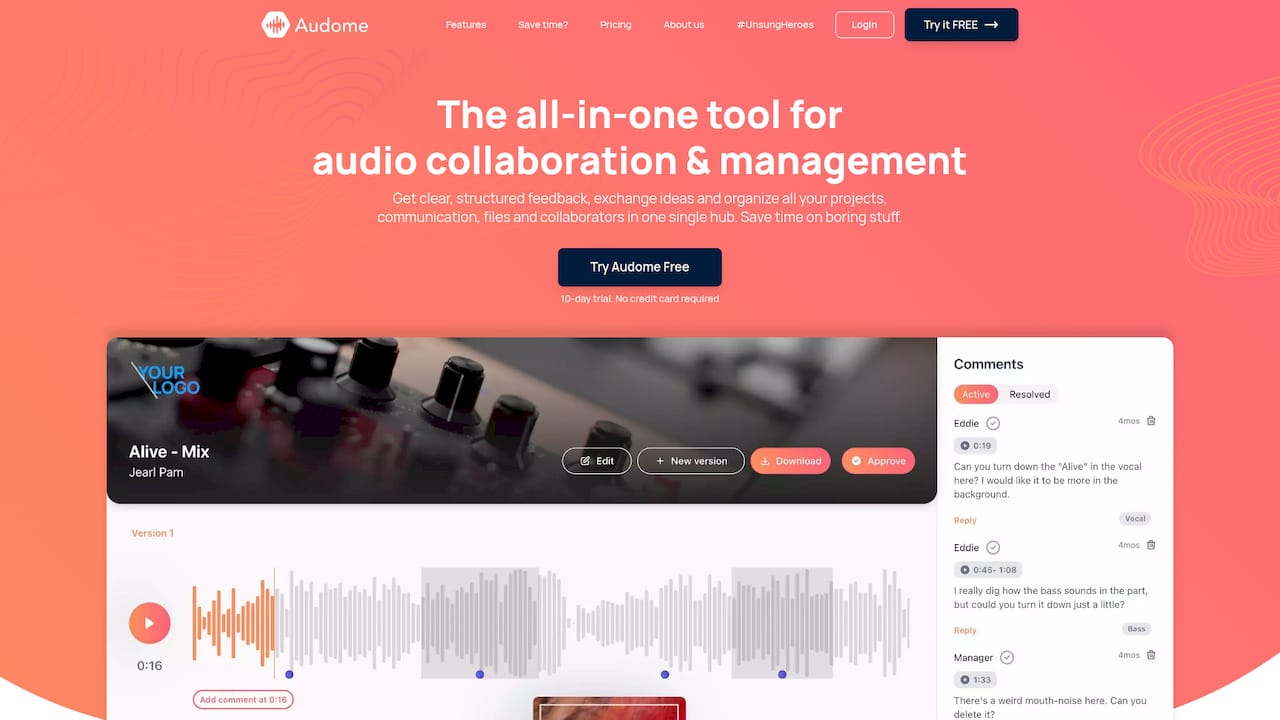
Audome also handles the business side of delivery. Studios can set revision limits, charge automatically for additional rounds, and lock final downloads behind payment through Stripe Connect. For audio professionals who want to spend time on the work rather than chasing approvals and managing scattered files, Audome’s collaboration tools replace the patchwork of Dropbox, email, and Discord that most studios still rely on.
FAQ
What file format should I use for audio deliverables?
WAV is the professional standard for audio deliverables. It preserves full audio quality at the session’s native sample rate and bit depth, unlike lossy formats such as MP3 or AAC.
What loudness target should I use for streaming platforms?
Streaming platforms generally target -14 LUFS integrated loudness with a true peak ceiling of around -1 dBTP. Broadcast delivery follows ATSC A/85 or EBU R128 depending on the region and network.
When should I apply dither during export?
Apply dither only once, at the final export step, and only when reducing bit depth, such as going from 24-bit to 16-bit. Never apply dither to intermediate bounces or when bit depth stays the same.
How many files should I send per delivery round?
Send 3–5 files per delivery round. This keeps client feedback focused and creates clear project checkpoints rather than overwhelming clients with a full stem pack at once.
Why do streaming platforms reject mono audio files?
Streaming distribution platforms require stereo, or 2-channel, audio files. A mono file does not meet the technical specification and triggers an automated rejection during the submission process.